
How Does Roof Ventilation Work?
Roof ventilation allows fresh outdoor air to enter your attic while warm, moist air escapes through vents near the roof’s highest point. This steady airflow helps control attic temperatures and moisture levels throughout the year.
A typical ventilation system has two main parts:
- Intake vents: Usually installed under the roof’s eaves, these allow fresh air to enter the attic.
- Exhaust vents: Located near the roof’s peak, these allow warm, moist air to escape.
Both types must work together to provide balanced airflow.
For example, during a hot Killingly summer, attic temperatures can rise quickly. Proper ventilation helps release trapped heat, while insulation and air sealing help keep your living spaces comfortable.
What Are the Most Common Signs of Poor Roof Ventilation?
Poor roof ventilation often causes problems before homeowners realize their attic needs attention. Here are some warning signs to watch for.
1. Hot and Uncomfortable Upstairs Rooms
If your upstairs rooms feel much warmer than the rest of your home during summer, trapped attic heat may be contributing to the problem.
2. Moisture, Mold, and Musty Odors
Condensation on attic surfaces, damp insulation, or a musty smell can indicate excess moisture caused by poor airflow or indoor air leaks.
3. Ice Dams Along the Roof Edges
During Connecticut winters, heat escaping into the attic can melt rooftop snow, which may refreeze near the eaves and form ice dams.
4. Damaged Roof Decking and Insulation
Excess attic moisture can cause wood decking to rot, insulation to become damp, and roofing materials to deteriorate over time.
If you notice these problems, don’t assume adding more vents will solve everything. A professional inspection can help identify whether ventilation, insulation, or air leaks are causing the issue.
What Is the Best Roof Ventilation System for a Residential Home?
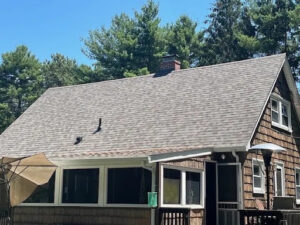
For many residential homes, a balanced ridge-and-soffit ventilation system is a practical choice. However, the best option depends on your roof’s design, attic layout, and existing ventilation.
1. Ridge and Soffit Ventilation
Soffit vents bring fresh air into the attic while ridge vents release warm, moist air along the roof’s peak.
2. Static Roof Vents
Static box vents allow attic air to escape naturally without using electricity or moving parts.
3. Gable Vents
Installed near the upper ends of gable walls, these vents provide airflow in certain attic designs.
4. Powered Attic Ventilation
Powered attic fans move air out of the attic but require proper intake ventilation to avoid pulling conditioned air from your home.
For many homes with traditional sloped roofs, ridge and soffit vents offer a simple, effective solution. However, homes with complex rooflines or limited soffit space may need a different setup.
A roofing professional can inspect your attic and recommend the right system instead of installing vents that may not work well together.
How Is Roof Ventilation Installed?
Professional roof ventilation installation involves more than cutting openings into your roof. Your contractor must check the attic, calculate ventilation needs, and install vents that work together.
Here’s what the process typically involves:
- Inspect the Attic and Roof: Your roofer checks existing vents, insulation, moisture problems, and roof conditions to identify airflow restrictions.
- Choose the Right Ventilation System: The contractor calculates the required ventilation area and selects suitable intake and exhaust vents.
- Install Intake and Exhaust Vents: The roofing team installs vents in the correct locations and uses proper flashing and sealing to prevent water leaks.
- Check the Finished System: Your contractor checks ventilation balance, inspects the installation, and cleans the work area.
How Much Does Roof Ventilation Installation Cost in Connecticut?
Roof ventilation installation costs in Connecticut vary based on the type of vents, roof size, and installation difficulty. Simple vent additions may cost a few hundred dollars, while larger projects involving multiple vents or roof modifications can cost considerably more.
Several factors affect your final estimate:
- Ventilation type: Ridge vents, box vents, and powered fans have different material and installation costs.
- Roof size: Larger roofs may require more ventilation.
- Roof accessibility: Steep or complex roofs can increase labor costs.
- Existing conditions: Damaged decking or blocked vents may require additional work.
- Installation scope: Adding one vent usually costs less than installing a complete ventilation system.
If you’re planning roof ventilation installation in Killingly, CT, request a detailed estimate from a roofing contractor.
A professional inspection can help you understand what your home needs and avoid paying for unnecessary vents.
What Should You Consider Before Installing Roof Ventilation?
Before installing new vents, it’s important to understand your attic’s existing conditions. A properly designed system should support airflow without creating moisture problems or affecting your roof’s weather protection.
Here are a few things to consider:
- Balanced airflow: Intake and exhaust vents should work together to move air through the attic.
- Attic insulation: Insulation should provide proper coverage without blocking ventilation openings.
- Air sealing: Gaps around attic hatches, lights, and pipes should be sealed to reduce warm indoor air entering the attic.
- Roof condition: Damaged shingles, flashing, or decking may need repairs before installation.
- Professional assessment: Your contractor should calculate ventilation requirements instead of guessing how many vents you need.
Remember, more ventilation isn’t always better. The goal is to create the right amount of airflow for your home’s design.